Creating scifi textures
You will require:-Registered version of Metasequoia 2.4+
python 2.2.3 (metasequoiia MUST have this version, I know it's lame)
Photoshop
Assuming you have metasequoia(registered version) running, go to the script panel, copy and paste the code below iinto it.
# 1001 random squares.
import sys
sys.path.append("C://Python22/Lib")
import random
k = sys.executable

print(k)


doc = MQSystem.getDocument()
num = doc.numObject
obj = doc.object[0]

v = []
v.append( obj.addVertex(0,0,0) )
v.append( obj.addVertex(1000,0,0) )
v.append( obj.addVertex(1000,0,1000) )
v.append( obj.addVertex(0,0,1000) )
obj.addFace(v)


for i in xrange(1000):

  q = random.randint(0,1000)
  qb = random.randint(0,1000)
  q2 = random.randint(0,40)+1


  v = []
  v.append( obj.addVertex(q-q2,100/q2,qb-q2) )
  v.append( obj.addVertex(q+q2,100/q2,qb-q2) )
  v.append( obj.addVertex(q+q2,100/q2,qb+q2) )
  v.append( obj.addVertex(q-q2,100/q2,qb+q2) )

  obj.addFace(v)
  #if i== 1000: break

print"stop"
What this will do is create 1000 random size squares and 1 background square.
You may have to edite ("C://Python22/Lib") to point to your own python 2.2.3 library.
NOTE: this only works on an unedited object list, click "New" to start fresh if it doesn't work.
The output is shown below:-
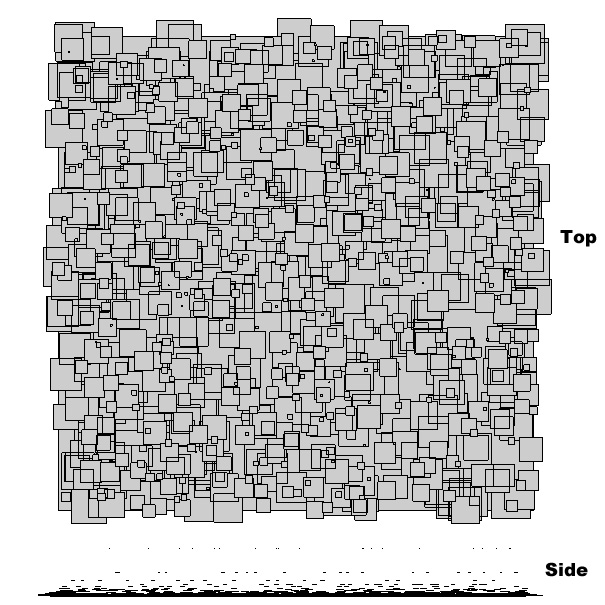
I hope you noticed that the smaller squares are a distance away from the larger ones.
We are now going to create a texture for all of them by using some of them, we don't need to, you could use a ready made texture and skip thiis sectioin, but I'm going to show you how to do it from scratch.
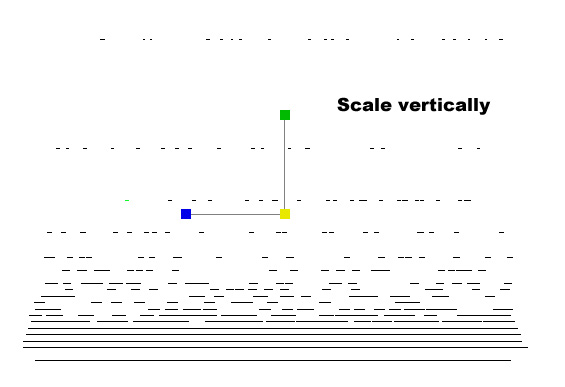
Select all the squares and scale them in the Y direction (green box) so they are further apart.
Like so:-
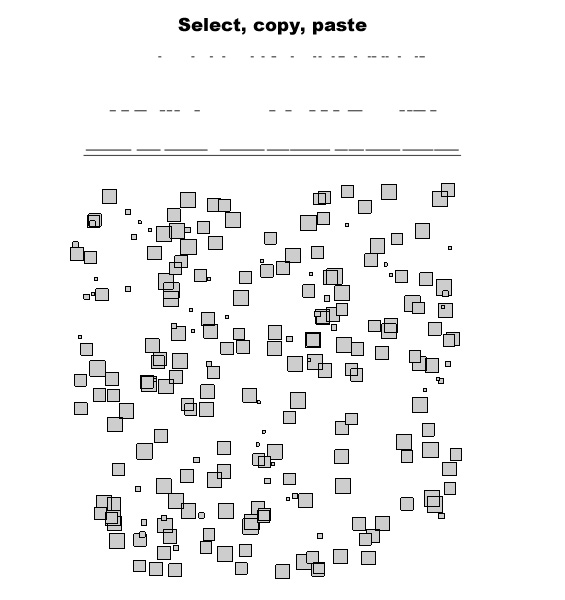
Now in the side view (F1 or F3 keys), select some of the squares using the Rect tool (shift+Rect to select more than one region).
Now copy and paste these into a new object, then turn off the original object
You should see something like this, (from side and top view) :-
Now press F2 to get the top view, turn off the lines (ln), zoom so they fill the screen and press the print button on your keyboard to do a screen capture.
You then need to create a new image in photoshop, paste the image and crop it as required.
The Image below shows what you will get, top left image.
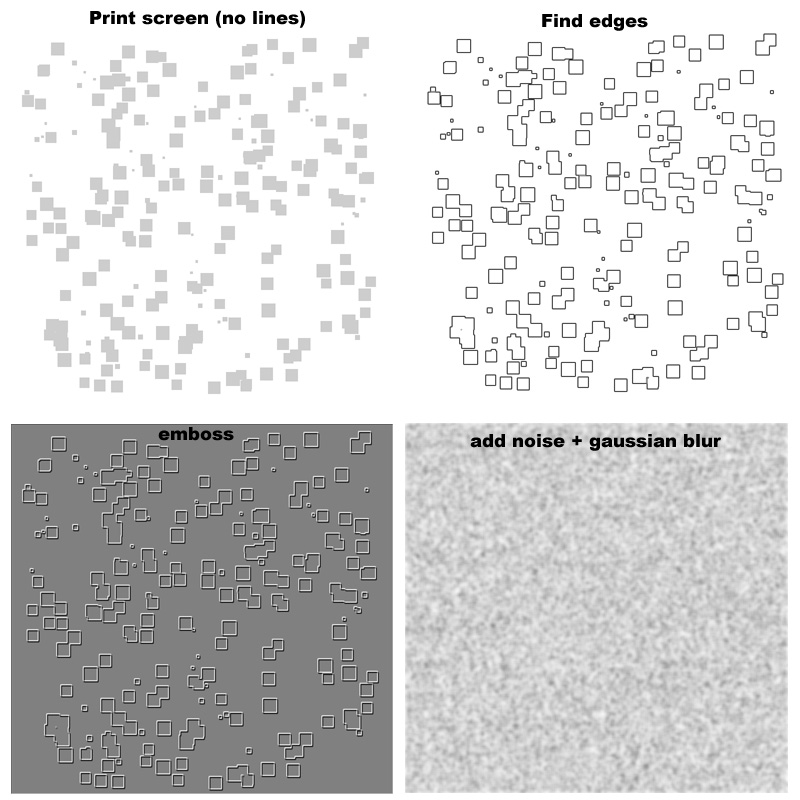
Now use the filters to edit the image, first find edges and then emboss.
SAVE the image at this point.
You can also have an alpha map to give the texture some extra detail.
Lets make a simple noise pattern, crate a new layer on top of the others (just making sure the images are the same size, doesn't matter if the aren't though) , fill it with white, add noise (monochrome), and then blur it using the gaussian blur.
SAVE the image as a different name.
Now back in metatsequoia, create a new material and set the texture to the embossed image and the alpha to the noise image.
You can play with the other setting like increasing emmisive if you want.
Turn off the squares you used to create the texture and turn the 1001 squares back on, select them all and set the material to the selected faces.
Now you won't see much difference just yet, we have to set the UVs so the texture is visible.
So with the 1001 squares object selected and the material selected (should only be one), click the UV tool.
Now in the UV tools, click the atlas button and wait, it takes about 30 seconds to process so be patient.
You should now see something like this, (moved the model and texture so you could see them) :-
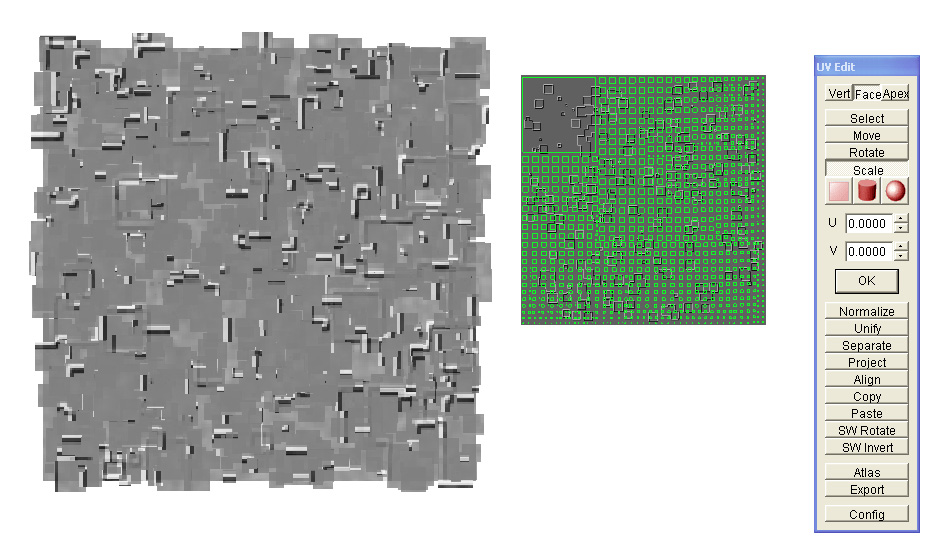
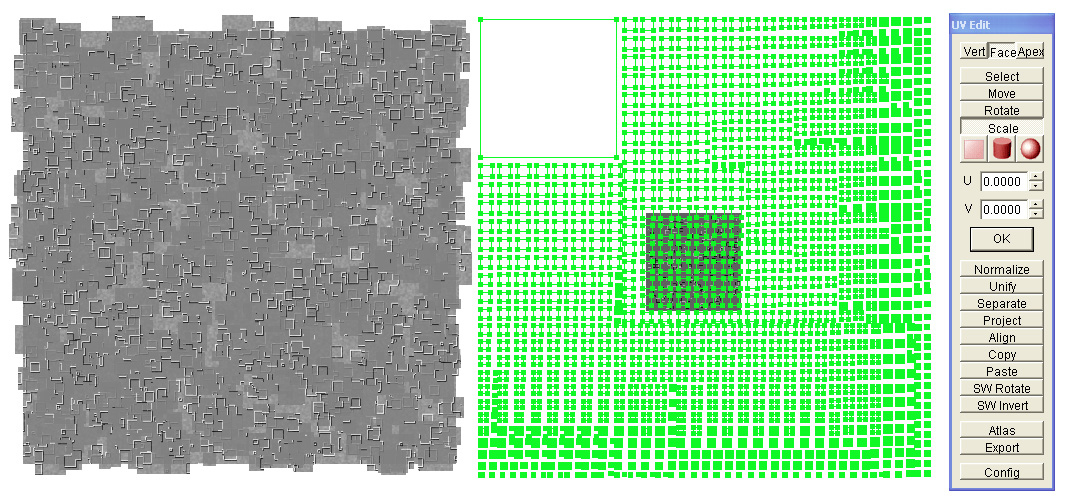
Now that is ugly as crap, so lets improve it, this is why this method works btw, click the move buton on the UV tools, rect select (if you have the Rc button pressed in the edit options) the UV layout to select all the sqaures, and then scale the UV layout (click the mouse near the middle of the texture and holding shift key, drag the mouse).
You should get somethiing like this:-
Now you can either do a screen grab (print key) or render it in metasequoia.
If you render it you need to save the alpha as well and use it as a 'screen' layer in photoshop, or just screen grab the render.
Paste it to a new image in photoshop, crop and save it as a texture.
Now that will produce a better image, but we can still improve things.
So in photoshop, play with the brightness and contrast, and anythiing else you want to, and save the image to a different name.
Now in metasequoia replace the texture image in the material you used, lets keep the alpha image as it was, the image will now be much better.
you can move the UVs around to create different textures with the same theme, colour some squares with different colours or textures, change your alpha image, anything you want to, have a play with it.
Not to mention usiing the textures you create to multiply, screen, colour, with other textures in photoshop....
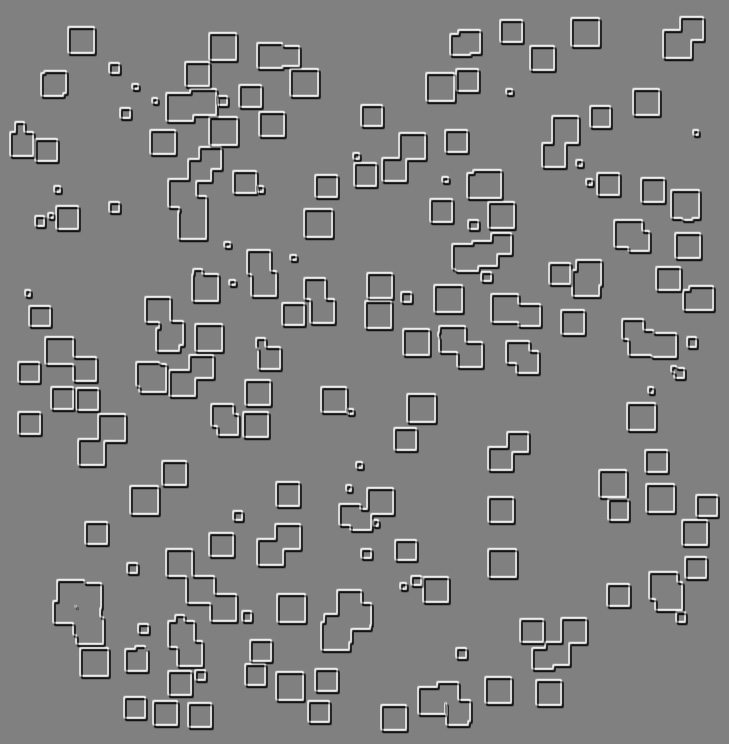
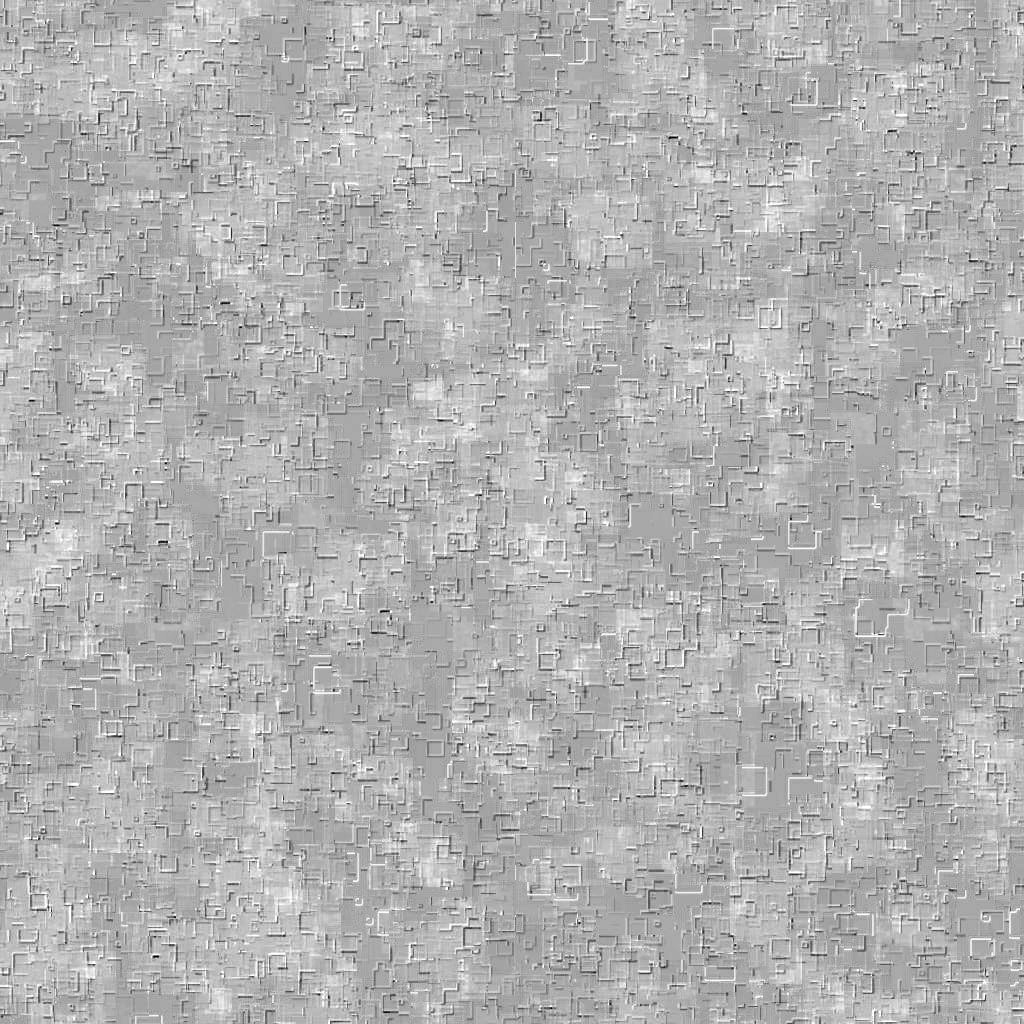
Here are the images produced using this method.
The original embossed squares texture.
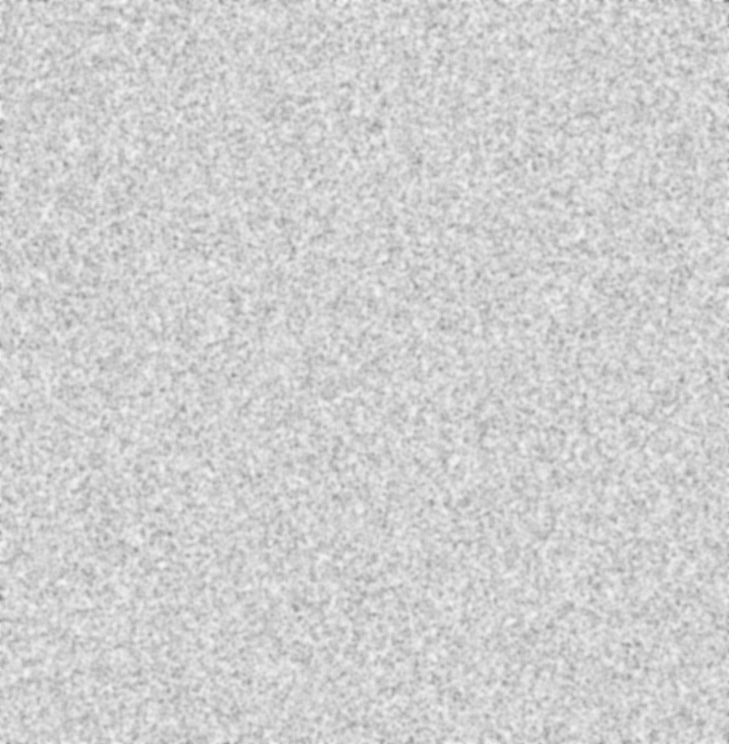
The original noise texture for the alpha texture.
The original output after scaling the UVs.

After plugging the created texture back in and playing with things in photoshop.
Copyright, may only be used for commericial and non profit applications relating to cricket bats, all rites reserved.
A metasequoia file containing a random generated square pattern can be found at the bottom of the page. (for those without registered vsrsion)
That's it, go away and create your own textures, your not having mine :)
Try some of the free textures on the net on the squares, and some fractal noise patterns (capture from the landscape plugin in metasequoia).
Last note, only 1 in 10 of your textures will stand out as a good texture, but don't delete the others, they are good for mixing in photoshop.

|
Texture1.zip Size : 45.886 Kb Type : zip |