Texturing with Metasequoia
What is a texture anyway?
A texture is simply a material with a picture(image) attached.You don't really need to know much more than that for now.
So lets create a texture.
Below shows a model with NO materials

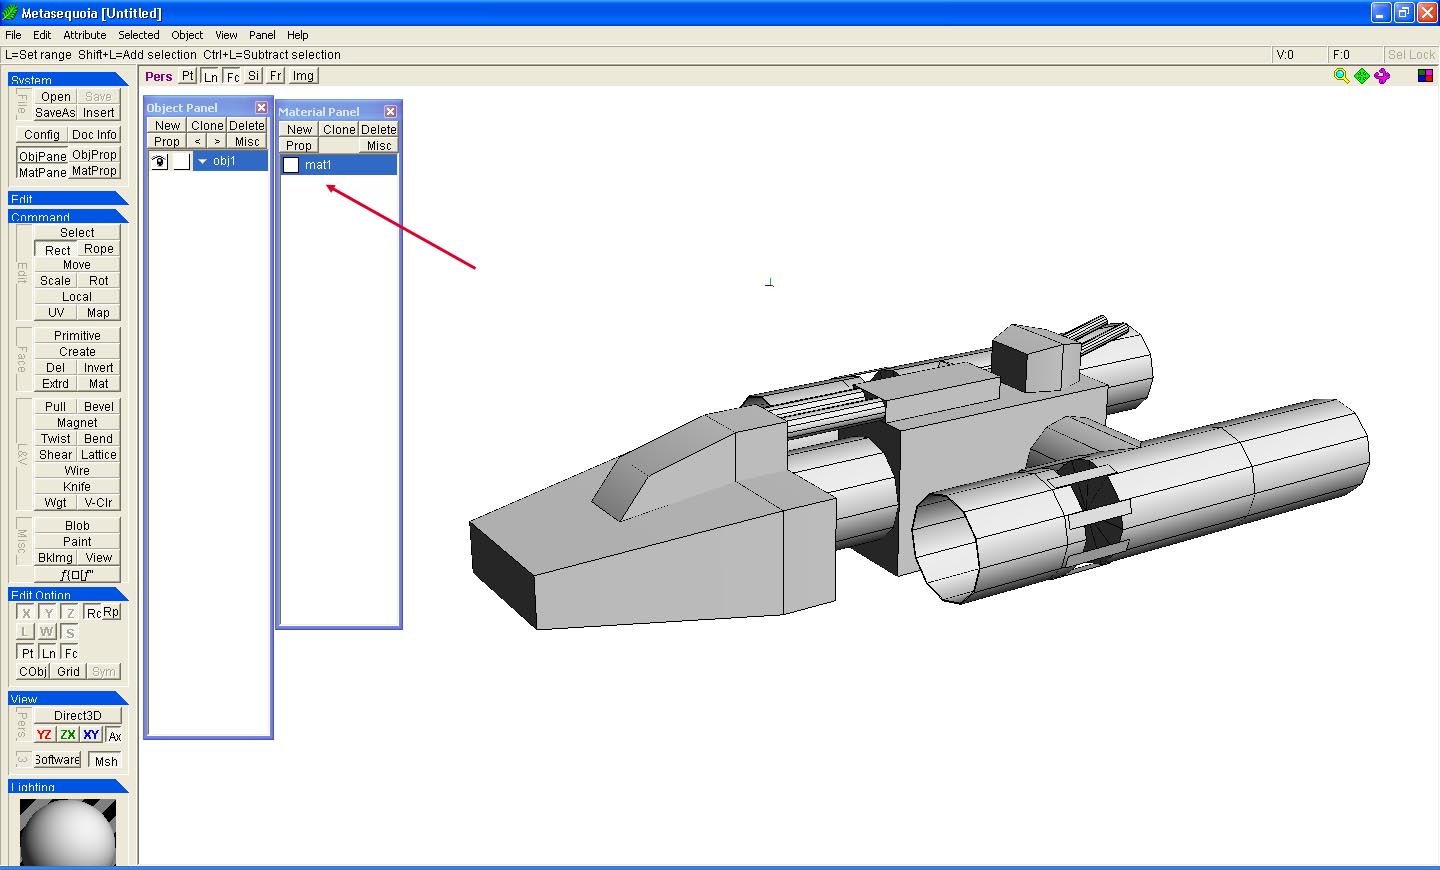
So first we need to create a NEW material to make a texture.

Below shows our new material but without any texture.
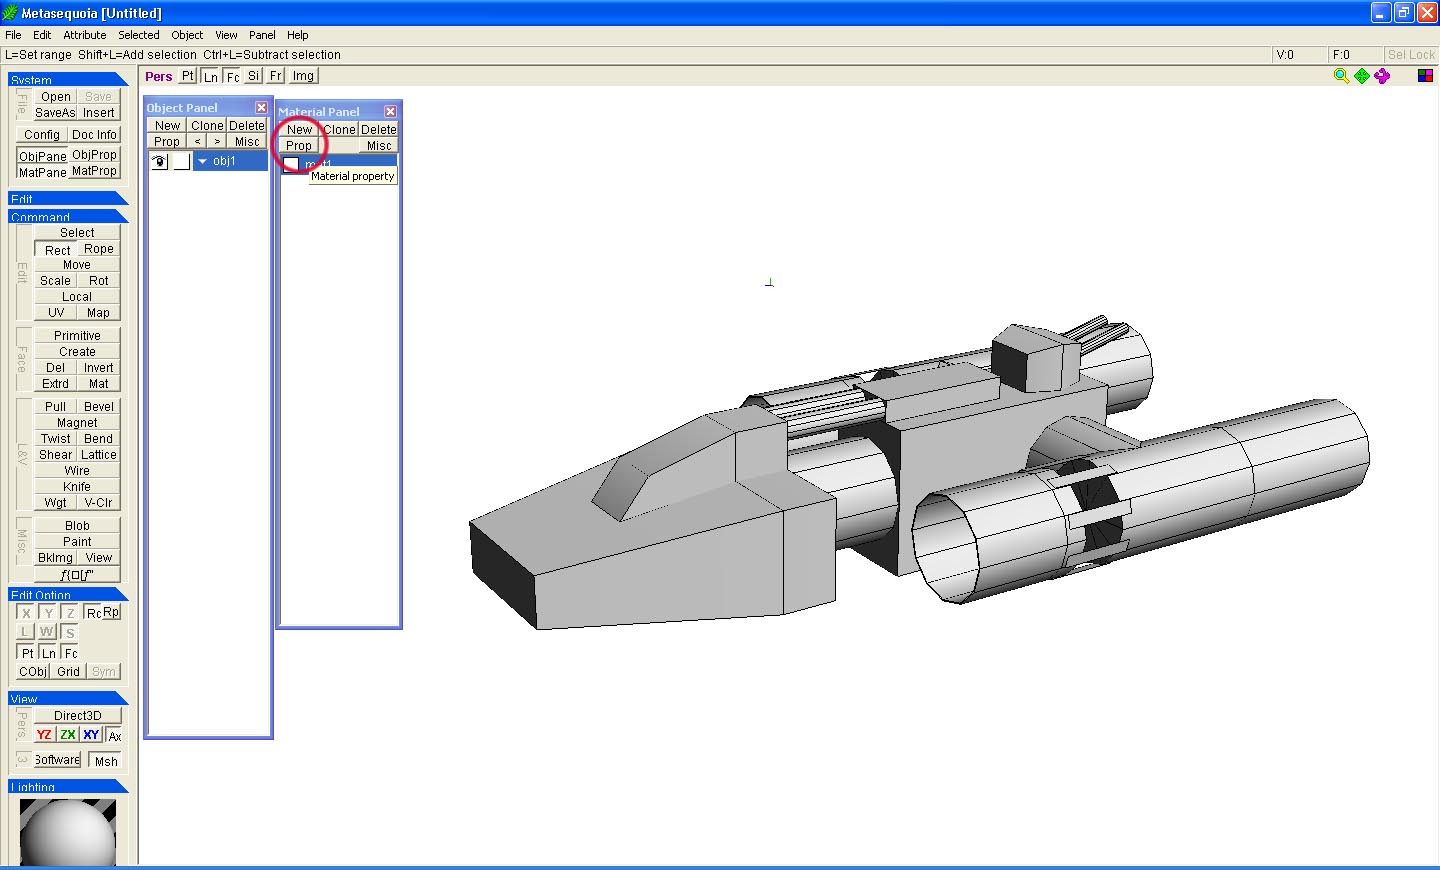
To add a picture to our material for the texture we need to go into the properties dialog, click the "Prop" button as shown below.
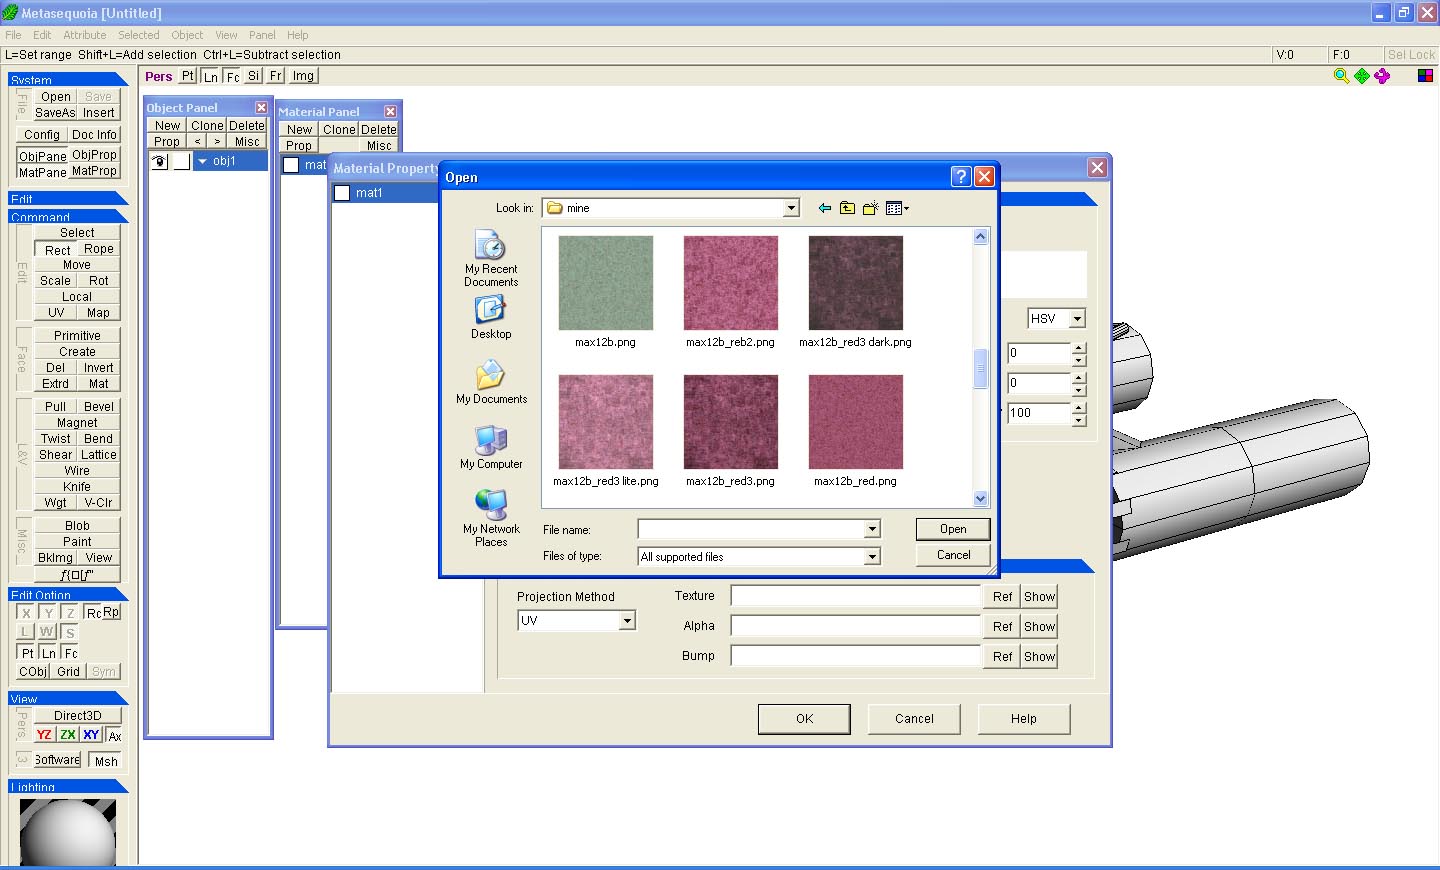
In this dialog we need to ad the picture to the "Texture" box shown below.
We do this by clicking the "ref" button. "ref" is the reference to the picture, or in english, the file path to the picture.
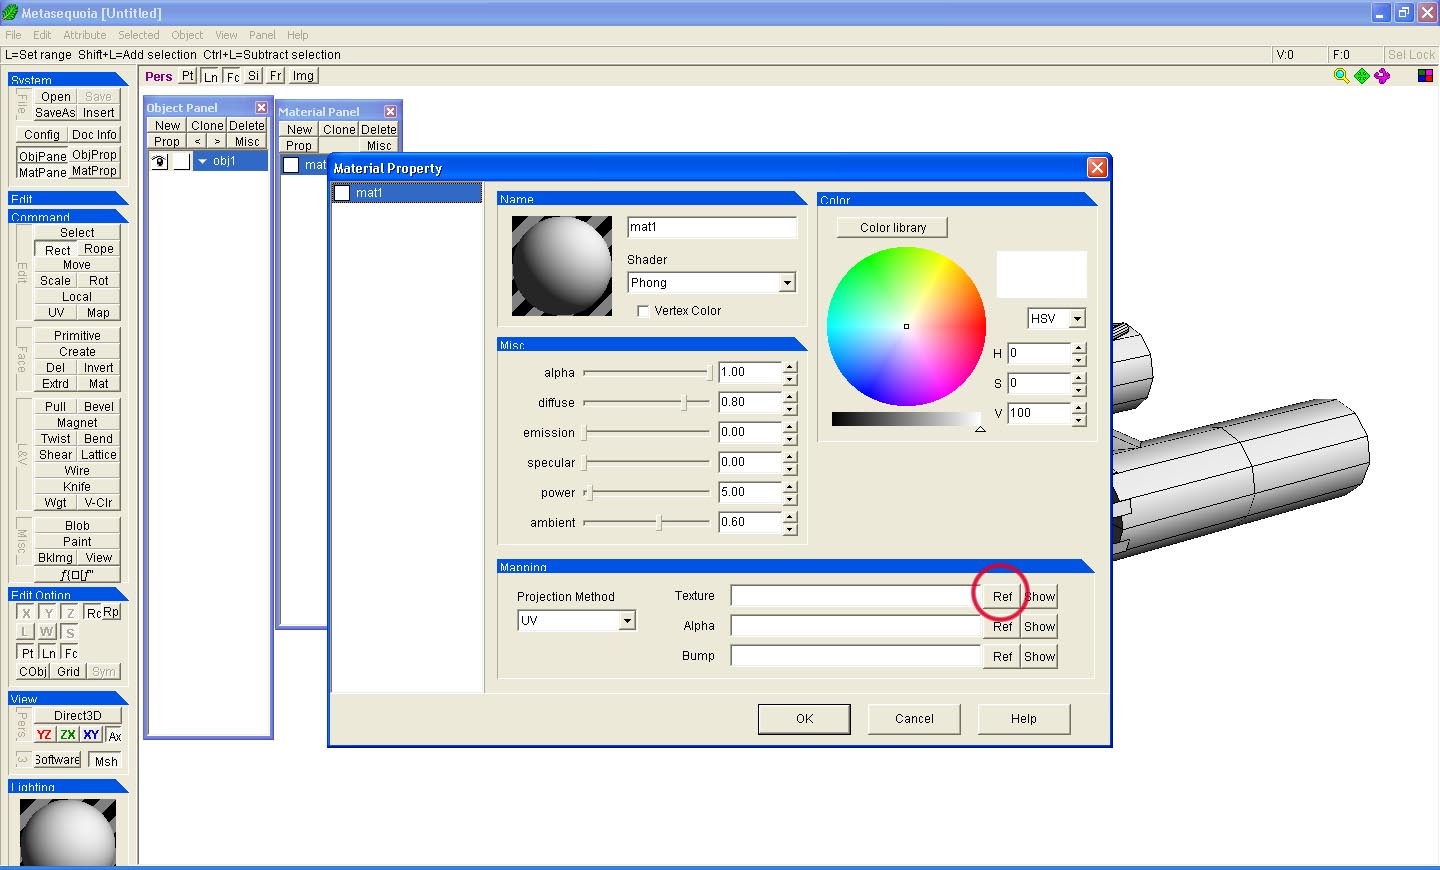
You then use the windows file browser dialog to find the picture you want. Click the picture you choose.
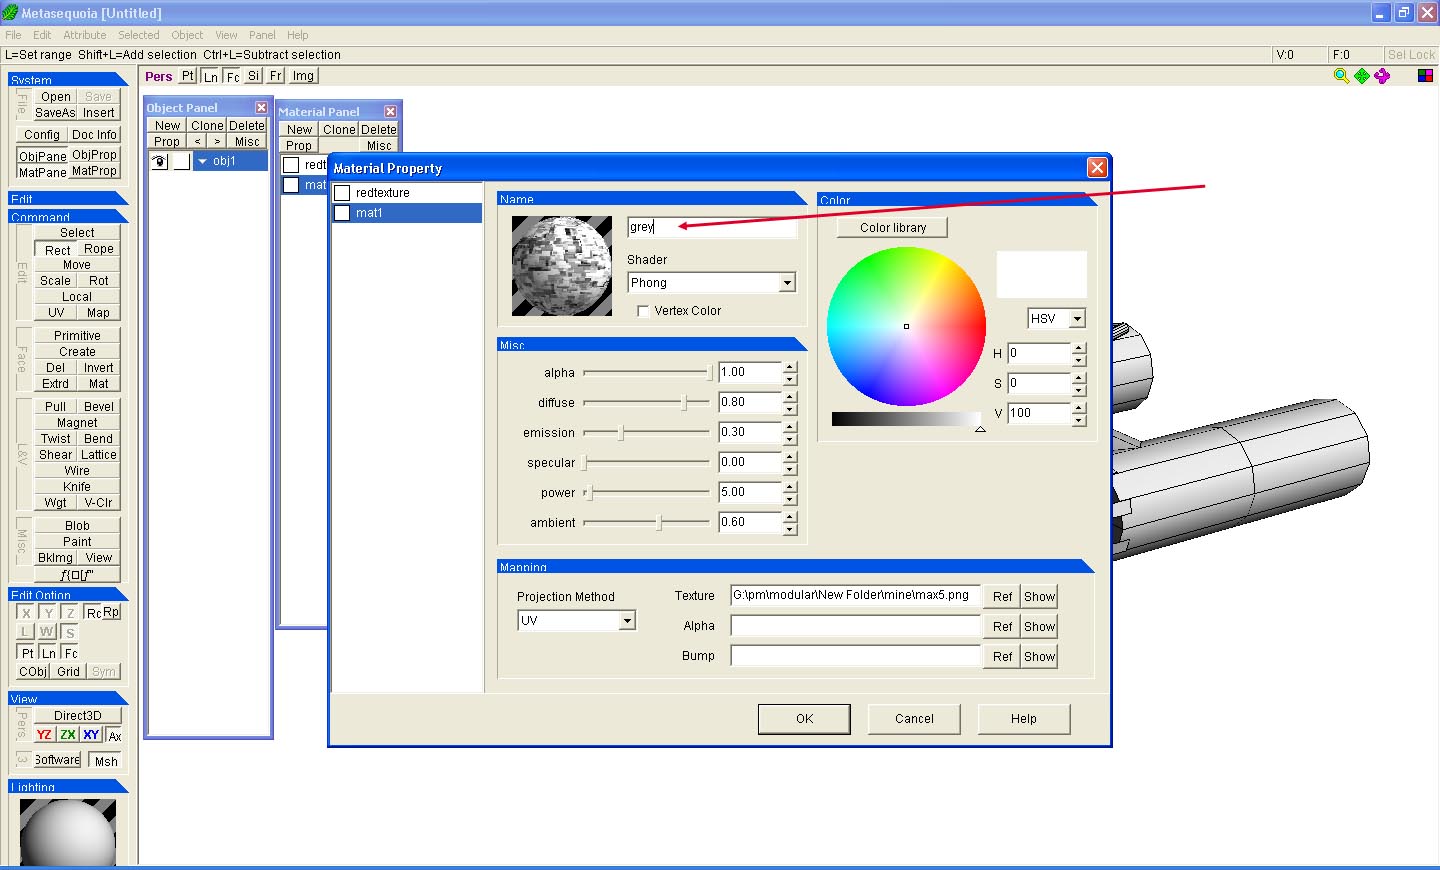
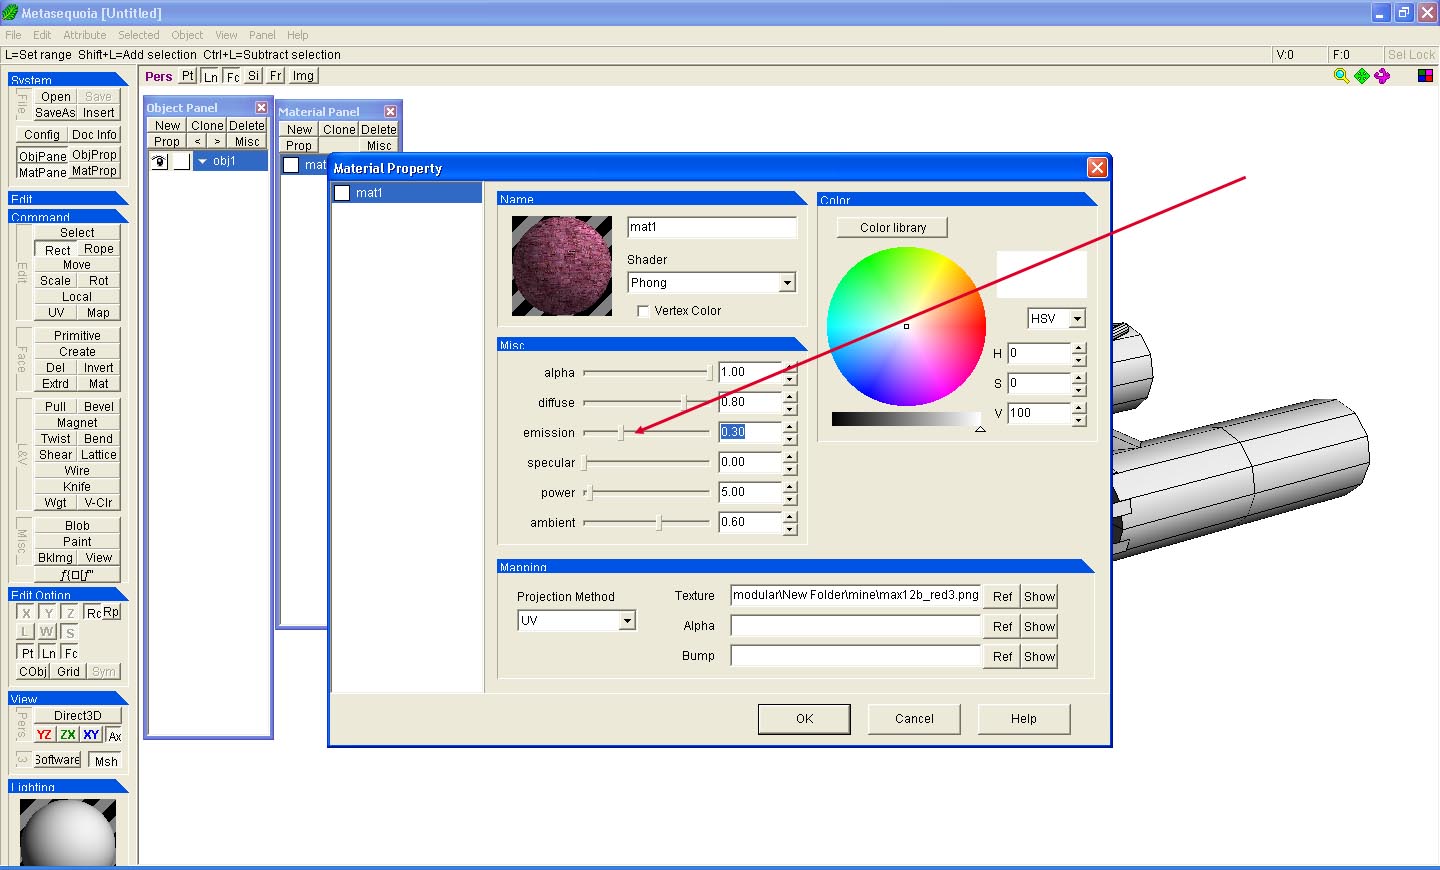
The material properties also lets you change how the texture is displayed, changing the emmission slider sets how the picture is effected by colour and shadows.
Changing it to 1.0 wiill stop all shadows and colour mixing with the material. Play with it to see the effect, also change the materials colour.
You can also change the materials name. Always try to give a name that is representatiive of what it is.
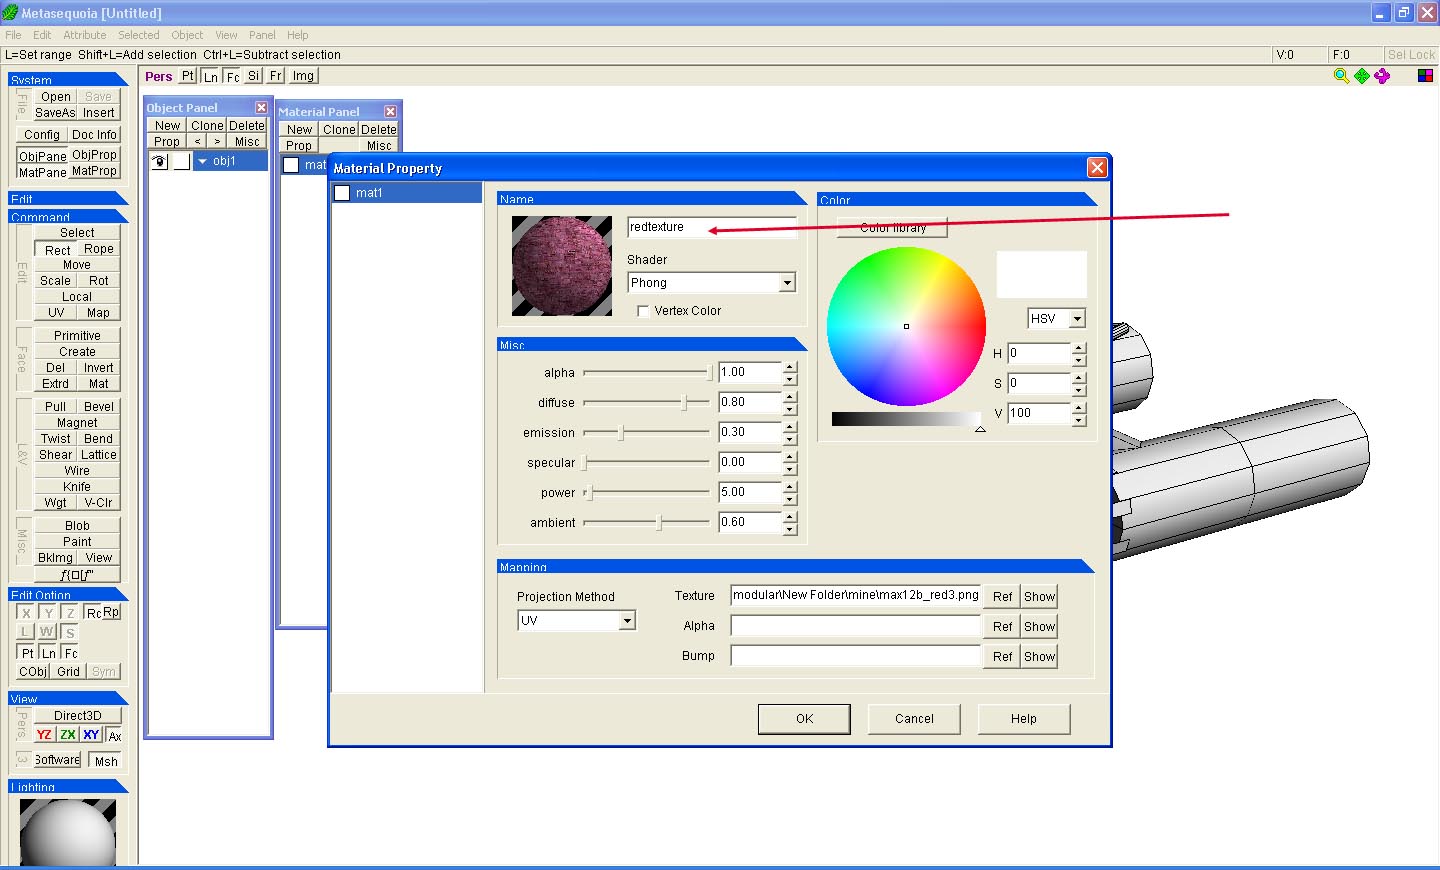
Now close the properties dialog by clicking the OK button.
You have now created a texture, easy wasn't it.
Before you go colouring your model with the texture lets quickly create another.
You could do the same thing as before and browse through your folders for an image or you can 'clone' a material that already has a texture image.
The advantage of cloning a material is that the new material has the colour, lighting seting and image referece (file path) of any texture.
So why is that better for us?
Metasequoia always starts looking in the default folder for a texture reference if no reference exists, which means you normally HAVE to manually browse to where the image is stored.
By cloning the material, and texture reference, the browser is set to the path of the image used, which means if all your images are in the same folder you don't have to browse through your folders to find them.
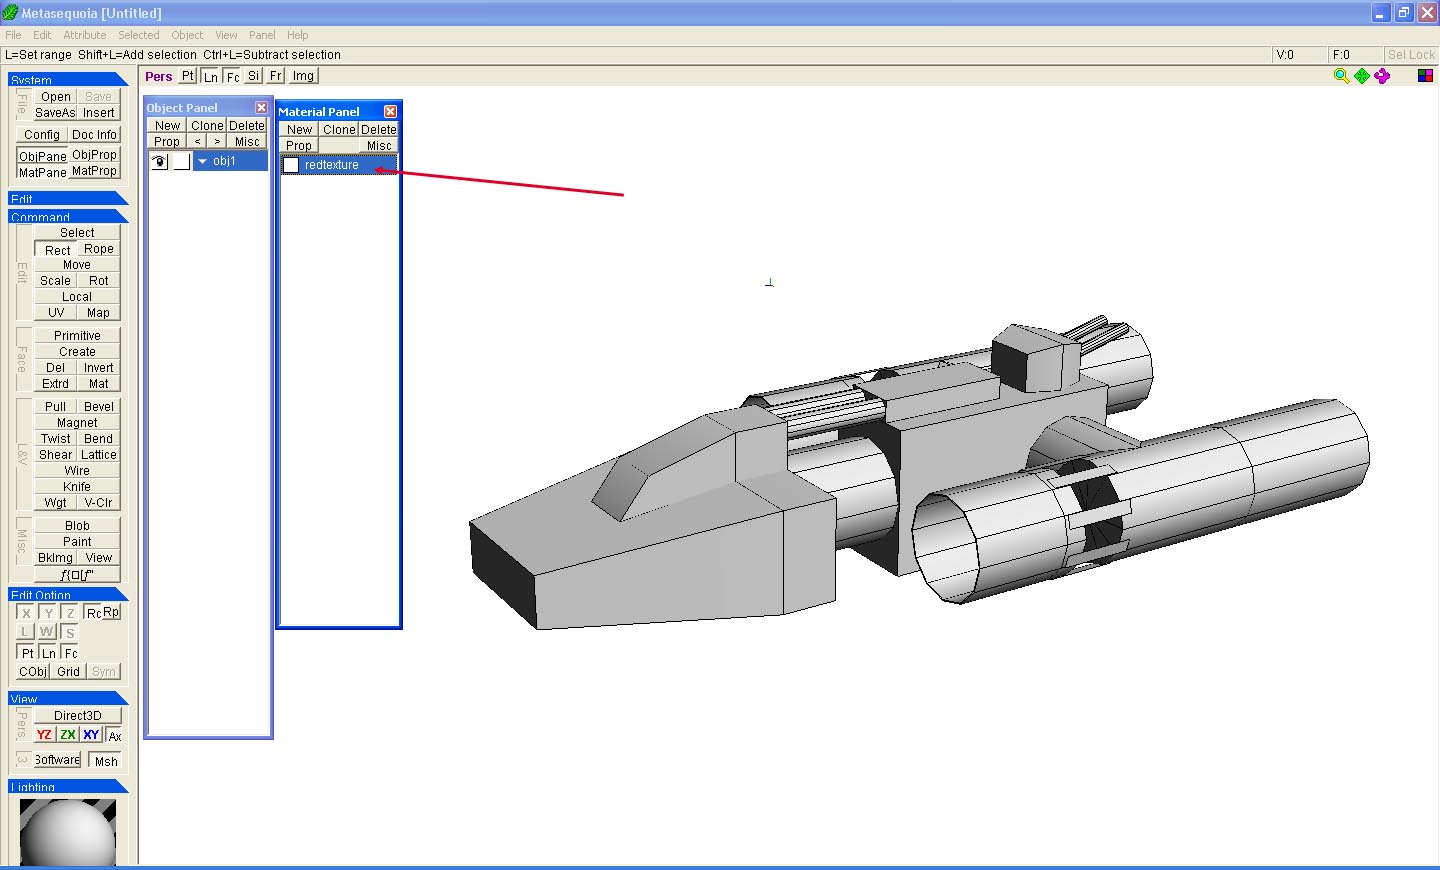
So lets clone the material.
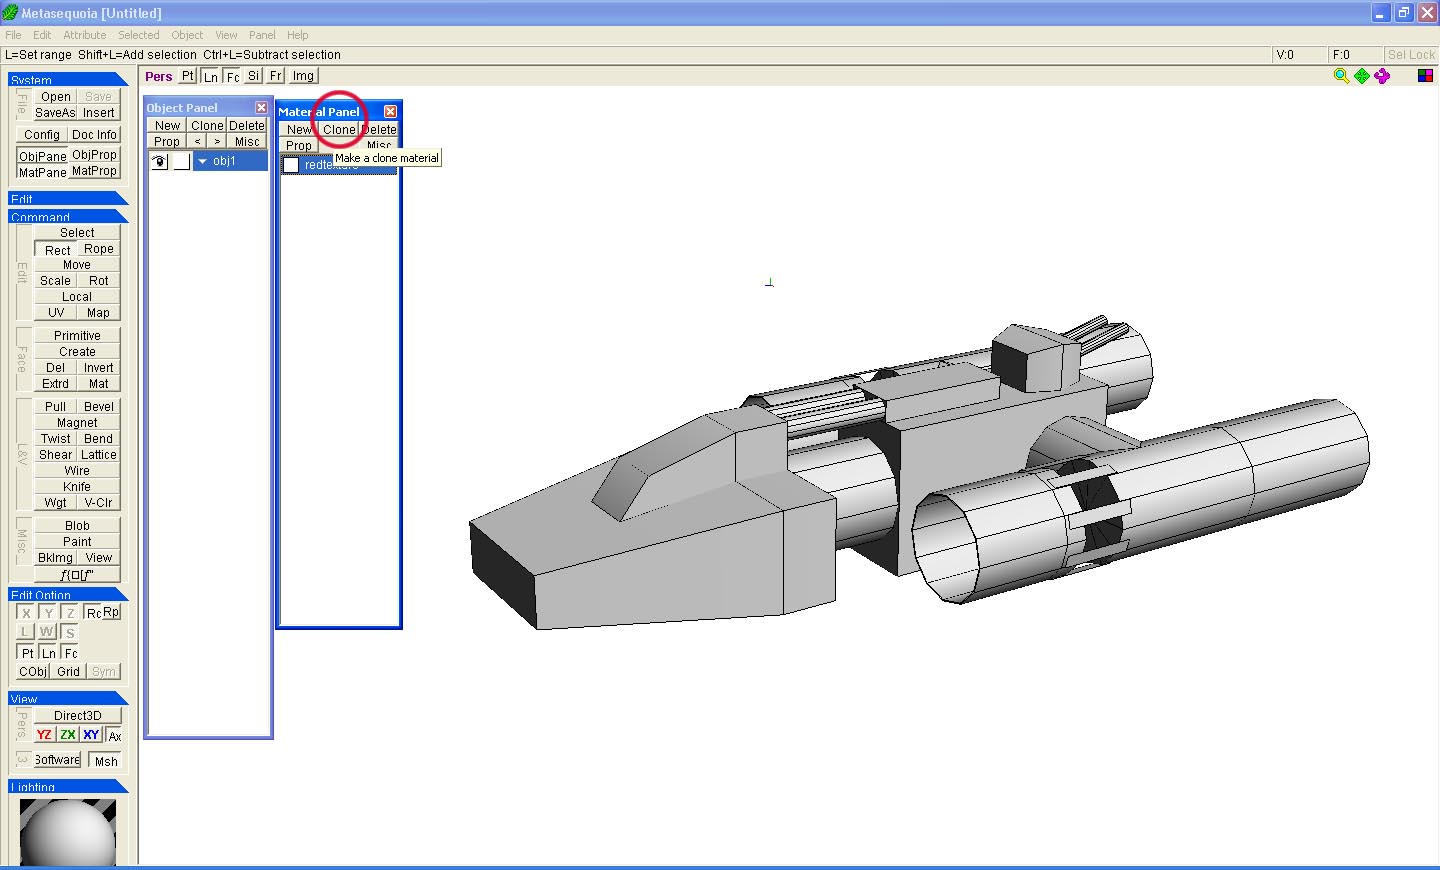
Below shows the cloned material. You don't see much diffence, it's a clone.
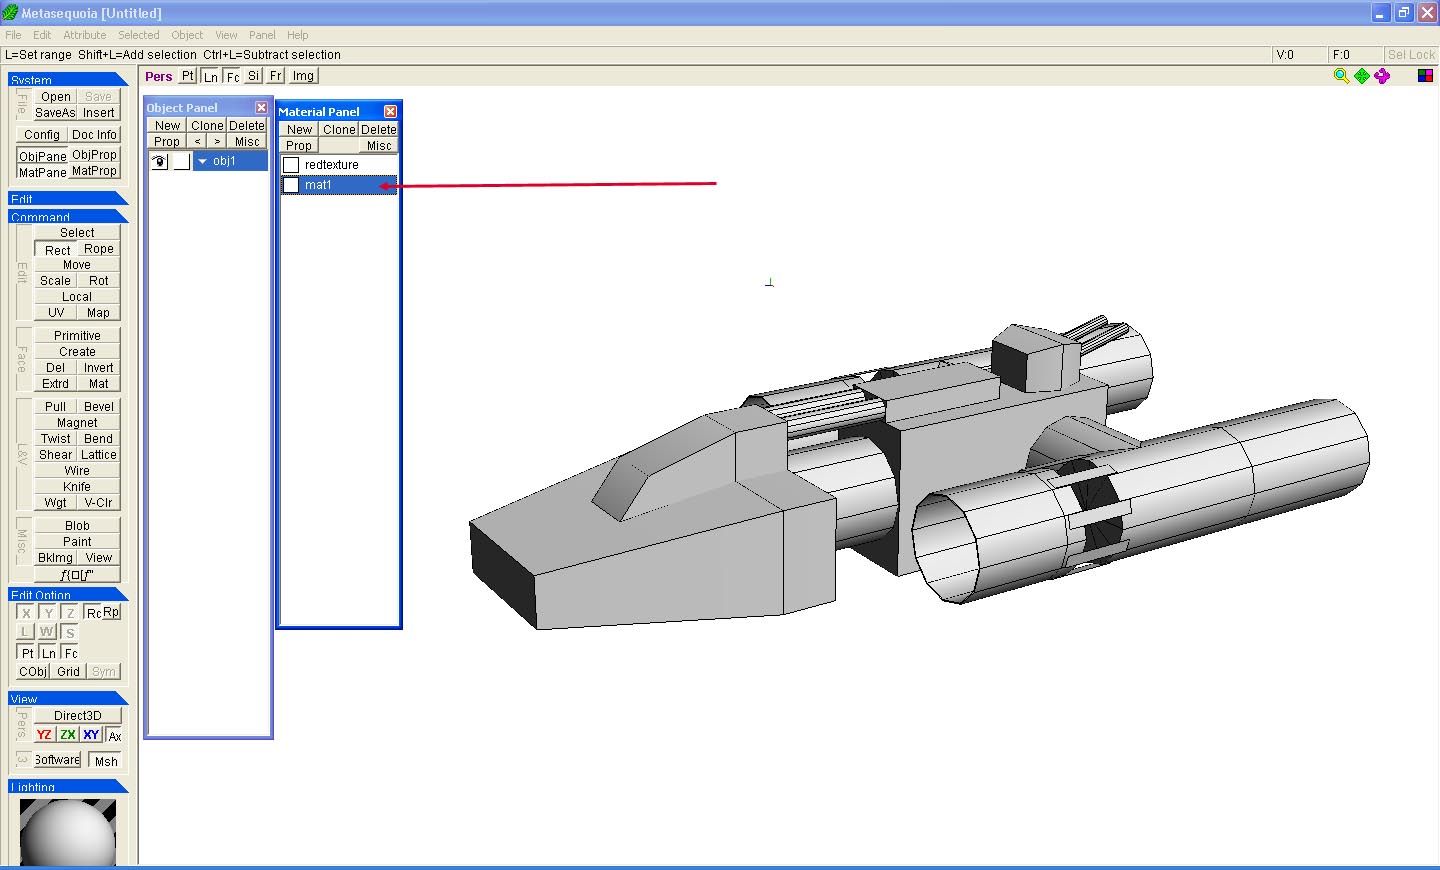
Click the "Prop" button on the cloned texture, you should notiice it is exactly the same, but with a new name, even the emmission value is copied.
Click the "ref" button, the windows browser will open in the folder that the current texture uses.
Change the texture image to somethinig else.
Rename the material to represent what it is.